Silver Clay Studio
STEP BY STEP SILVER CLAY 4 BEGINNERS
Making jewellery with silver clay involves shaping the clay and then firing it to burn off the binder, leaving behind a solid piece of pure silver. This is a popular technique for both beginners and experienced jewellers because it doesn't require traditional silversmithing skills.
Materials and tools
- Silver clay: Typically sold in lump, paste, or syringe forms. For beginners, fine silver clay (.999) is recommended because it is easier to fire with a torch.
- Non-stick surface: A Teflon sheet or a silicone mat prevents the clay from sticking. You can also use a special "clay balm".
- Acrylic roller and spacers: Rollers and strips of playing cards or acrylic spacers ensure the clay is rolled to an even thickness.
- Clay cutters or a needle tool: Used to cut shapes from your clay.
- Jeweller’s torch and firing surface: For firing small pieces, a handheld butane torch is sufficient. You will also need a heat-resistant surface, such as a soldering block.
- Brass brush: Used for polishing the piece after firing.
- Finishing tools: Sanding pads or papers, an agate burnisher, and polishing cloths are used to refine and shine your finished piece.
- Water and a paintbrush: Keeps the clay moist while you work and can be used to create a paste (slip) to join pieces
Step-by-step instructions
1. Prepare the clay
- Condition the clay. Cut the amount of silver clay you need and work it in your hands until it becomes soft and pliable. Immediately reseal any unused clay in its original packaging with a damp wipe to prevent it from drying out.
- Roll out the clay. Use an acrylic roller and spacers to roll the clay to your desired, even thickness on a non-stick surface. For pendants, a thickness of 3 to 5 playing cards is a good starting point.
- Add texture (optional). Press a textured sheet, lace, or a natural object like a leaf into the clay to create an impression. You can also press your own fingerprint into the clay.
- Cut your shape. Use a clay cutter or a needle tool to cut out your design. If you're making a pendant or charm, use a straw to create a hole for a jump ring.
- Dry the piece
- Let your clay piece dry completely. You can let it air-dry naturally or speed up the process with a hot plate, food dehydrator, or even a hair dryer. The piece will be much more fragile once it's dry, so handle it carefully.
- Refine and sand
- Once dry, use sanding pads and needle files to smooth edges and fix any bumps or imperfections. The final finish will largely depend on how well you sand at this stage.
- Fire the clay
- Warning: Only fire in a well-ventilated area
- Place the piece on a heatproof surface, such as a soldering block.
- Torch the piece. Heat the clay with a handheld torch, holding the flame about 5 cm away at a 45-degree angle.
- Burn off the binder. The organic binder will ignite and burn off, creating a small flame and smoke.
- Sinter the silver. After the binder burns away, continue heating the piece. It will begin to glow a peach or orange colour. Maintain this glow for 2 to 5 minutes, depending on the piece's size, to allow the silver particles to fuse together (sinter).
- Cool the piece. Allow the piece to cool completely before handling.
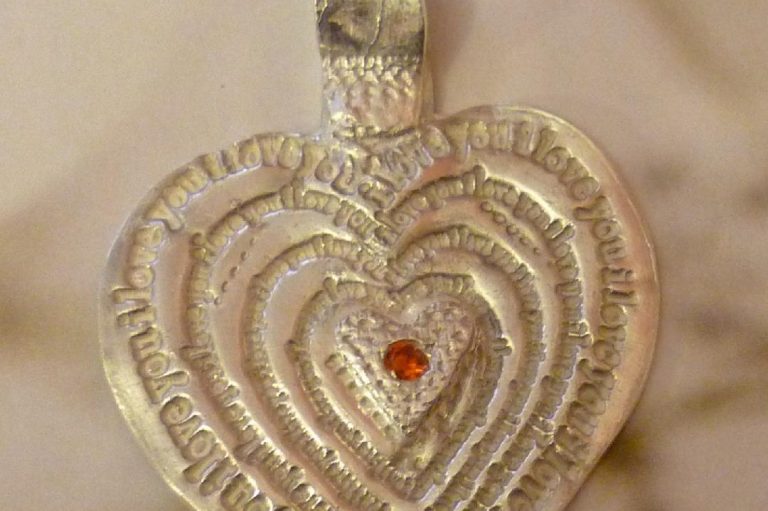
- Finish and Polish.
- Remove the white coating. After cooling, the fired piece will have a white, frosty appearance. Use a stiff brass brush to burnish the surface until it begins to shine.
- Achieve a mirror finish (optional). Use progressively finer sanding papers, a polishing cloth, or an agate burnisher to achieve a high-gloss, mirror-like finish.
- Add findings. Attach jump rings, chains, or ear wires to your finished silver piece to complete your jewellery.
Silver Clay Studio - Silver Clay Techniques for Beginners
Beginners and novices in Precious Metal Clay
Pat holds a UK Diploma in Precious Metal Clay with Teaching
City & Guilds in Silversmithing with 3 D design
999 Silver. Basic techniques for you to make Silver Clay Jewellery. Nothing complicated. You will become confident as I explain the process.
Silver Clay
Practice your designs here
Gather your items together
Plastercine/Fimo/ or NewPlast - This is used to practice rolling out and texturing designs
Acrylic roller - non stick surface - cooking cutters - textures - something to make a small hole for a jump ring
1. Take a small amount of Newplast / plasterince and roll into a ball in the palm of your hand (note Silver clay will be much softer).
2. Flatten the round ball so it sits flat.
3. With your roller roll up and down to around 5 mm thick (This is a practice so do not roll too thinly as you may wish to add a texture).

Training
Quality
Efficiency